Integrate with Rancher
Support level: authentik
What is Rancher
An enterprise platform for managing Kubernetes Everywhere Rancher is a platform built to address the needs of the DevOps teams deploying applications with Kubernetes, and the IT staff responsible for delivering an enterprise-critical service.
Preparation
The following placeholders are used in this guide:
rancher.companyis the FQDN of the Rancher installation.authentik.companyis the FQDN of the authentik installation.
This documentation lists only the settings that you need to change from their default values. Be aware that any changes other than those explicitly mentioned in this guide could cause issues accessing your application.
Under Customization -> Property Mappings, create a SAML Property Mapping. Give it a name like "SAML Rancher User ID". Set the SAML name to rancherUidUsername and the expression to the following
return f"{user.pk}-{user.username}"
Create an application in authentik. Set the Launch URL to https://rancher.company, as Rancher does not currently support IdP-initiated logins.
Create a SAML provider with the following parameters:
- ACS URL:
https://rancher.company/v1-saml/adfs/saml/acs - Audience:
https://rancher.company/v1-saml/adfs/saml/metadata - Issuer:
authentik - Service Provider Binding:
Post - Property mappings: Select all default mappings and the mapping you've created above.
- Signing Certificate: Select the authentik self-signed certificate.
You can of course use a custom signing certificate, and adjust durations.
Rancher
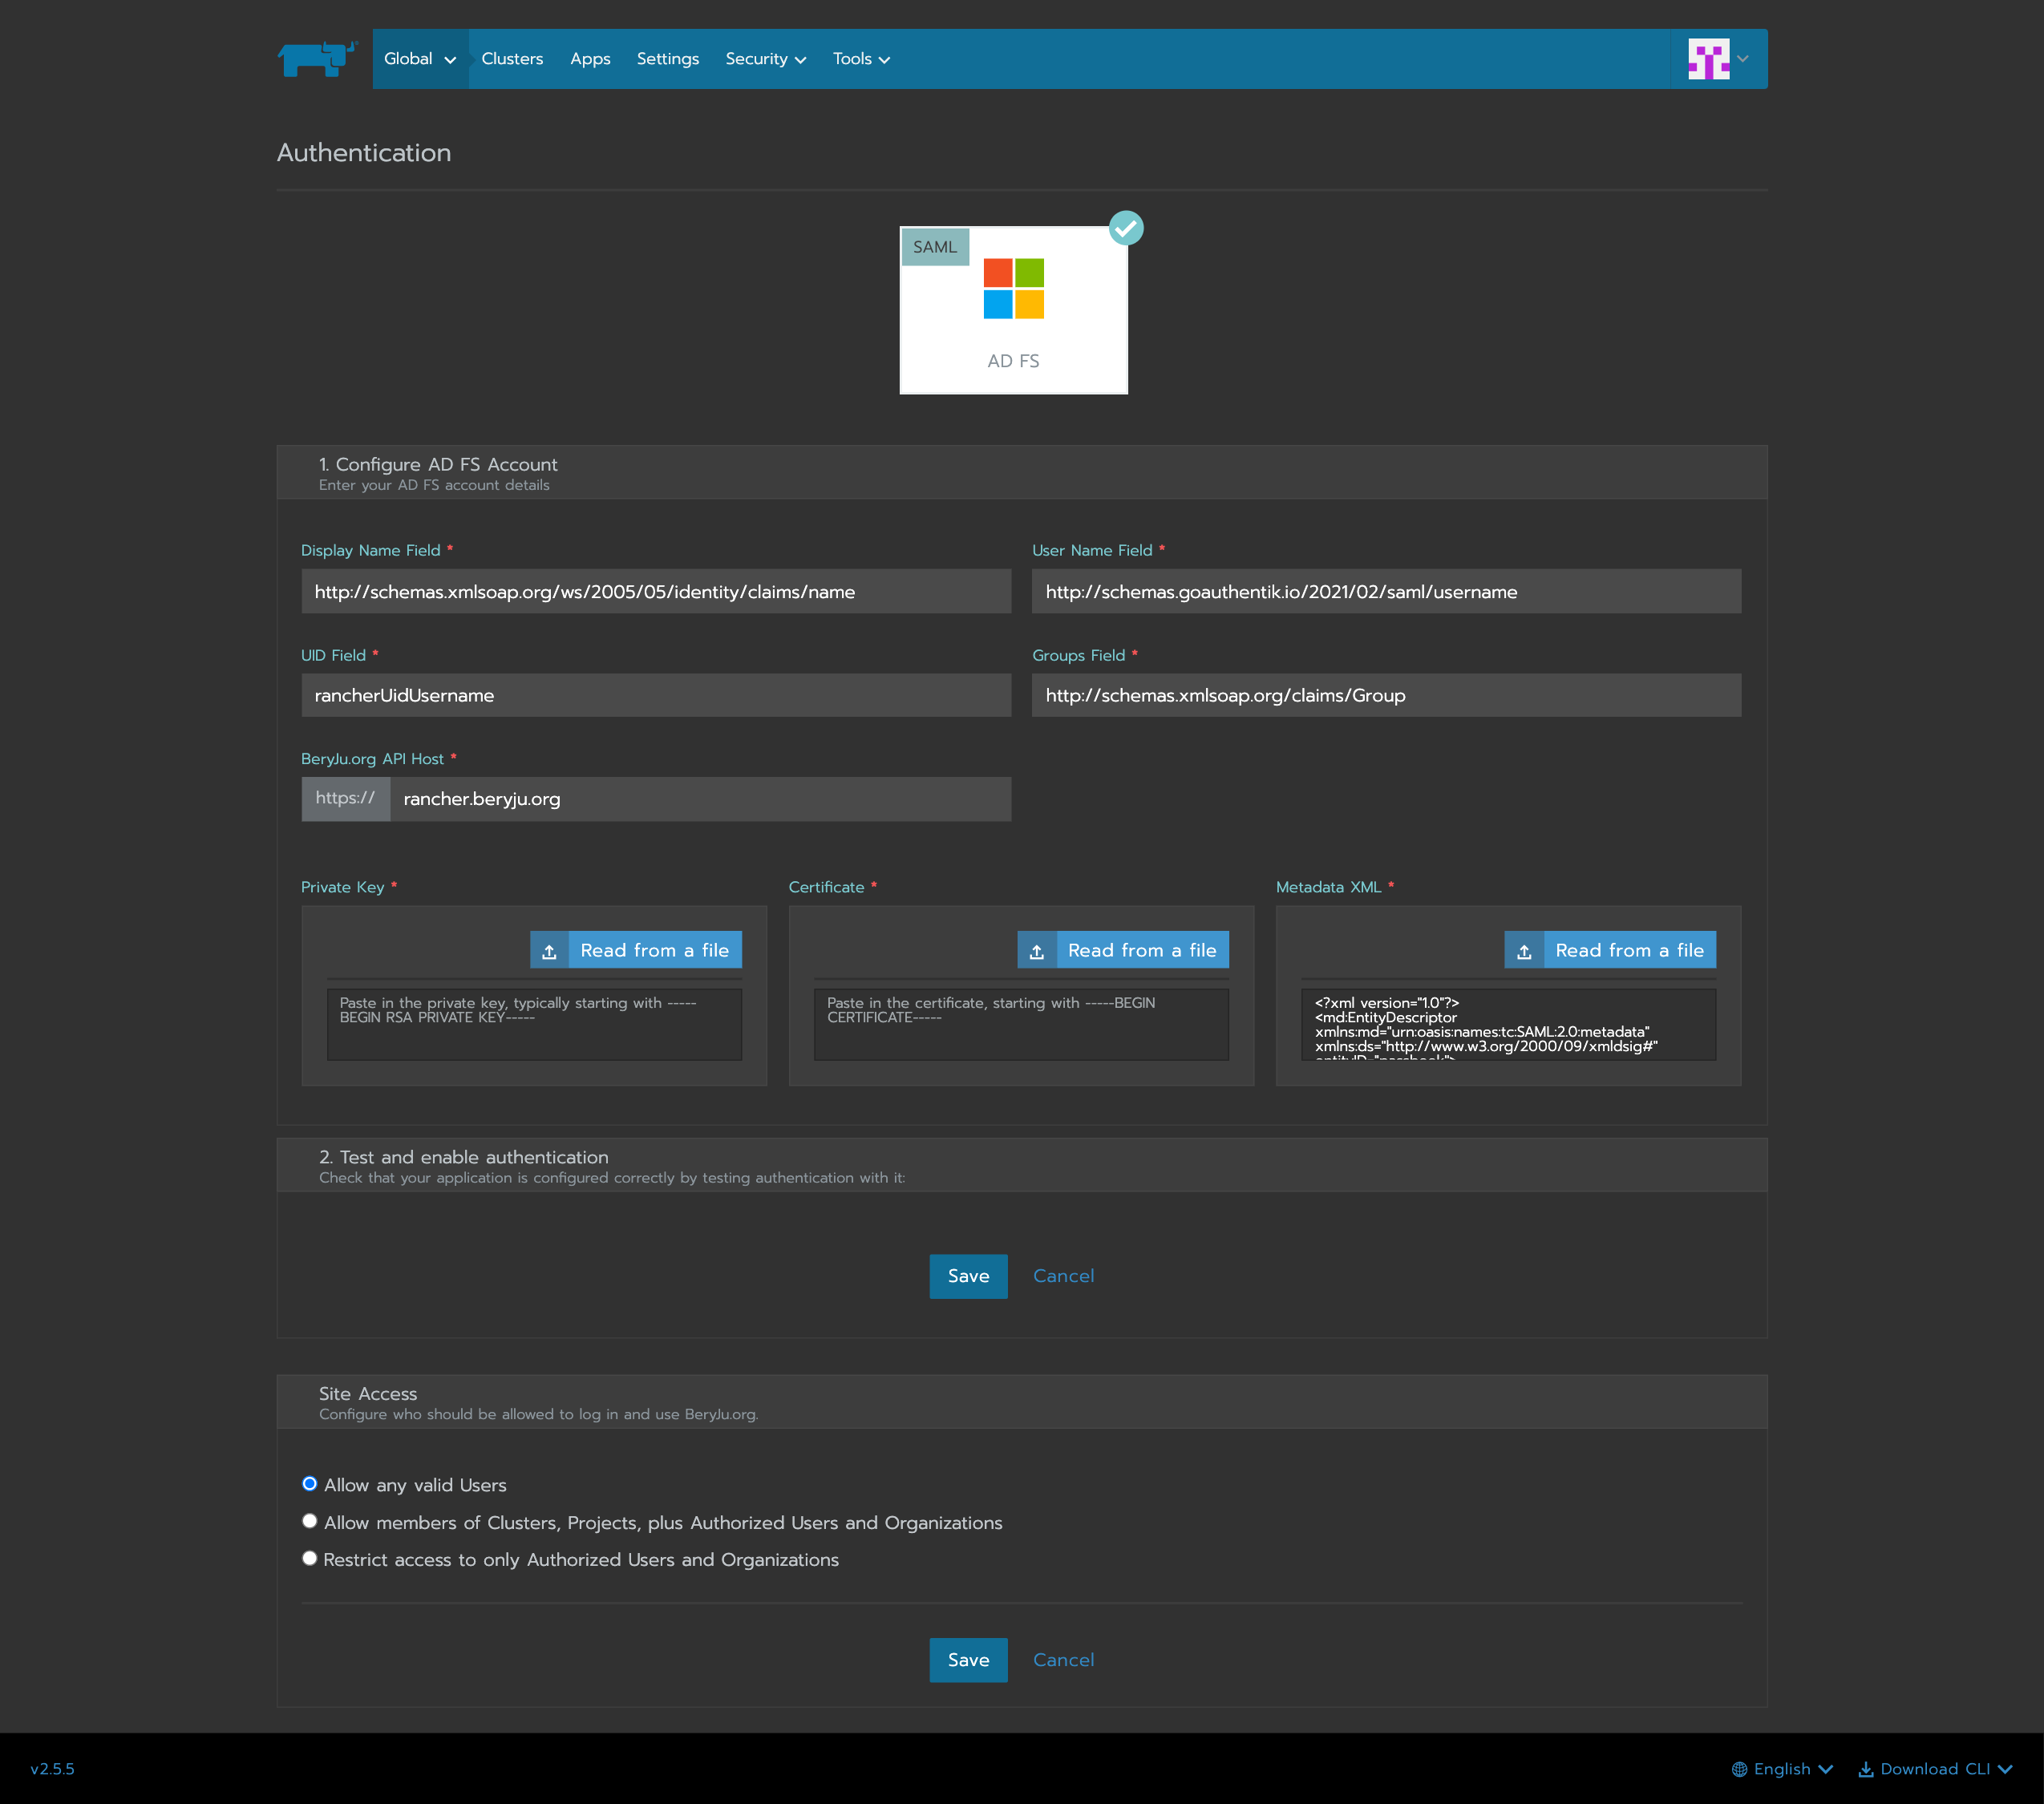
In Rancher, navigate to Global -> Security -> Authentication, and select ADFS.
Fill in the fields
- Display Name Field:
http://schemas.xmlsoap.org/ws/2005/05/identity/claims/name - User Name Field:
http://schemas.goauthentik.io/2021/02/saml/username - UID Field:
rancherUidUsername - Groups Field:
http://schemas.xmlsoap.org/claims/Group
For the private key and certificate, you can either generate a new pair (in authentik, navigate to Identity & Cryptography -> Certificates and select Generate), or use an existing pair.
Copy the metadata from authentik, and paste it in the metadata field.
Click on save to test the authentication.